
Business Partners and Employees can create and share events in the RANGGO App. These can be In-Person Events and Online Events.
Businesses can use the feature to create and share internal events, or meetings, for their employees. They can also create and share events to other people using the App – like Networking events, Job Fairs, training, or seminar events that they are hosting or attending.
Employees can use the feature to create and share events. Whether it is a get-together with ex-colleagues, or a Networking event for people doing the same job as them.
How to Create and Share Events in the RANGGO App.
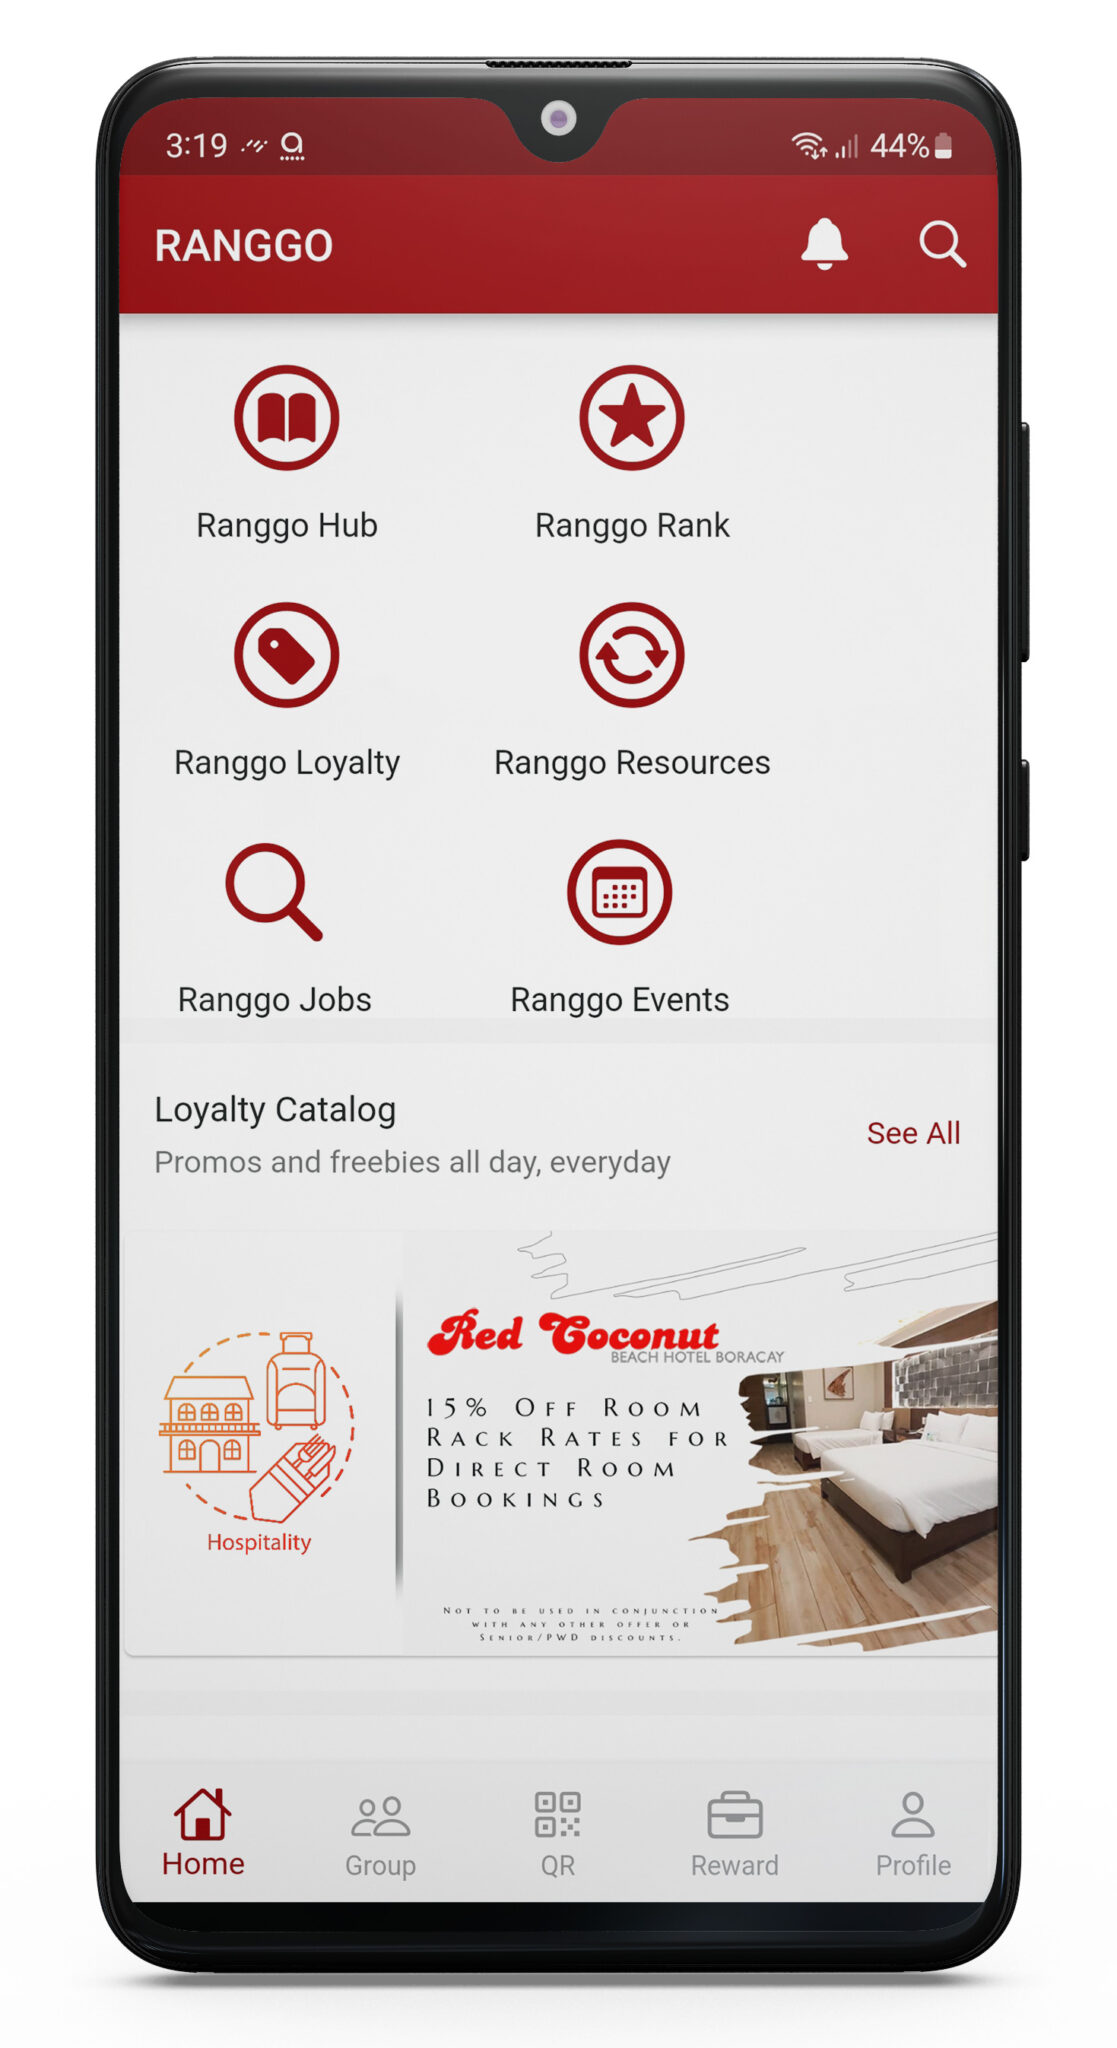
Go to the Home Page and select the Event Icon.
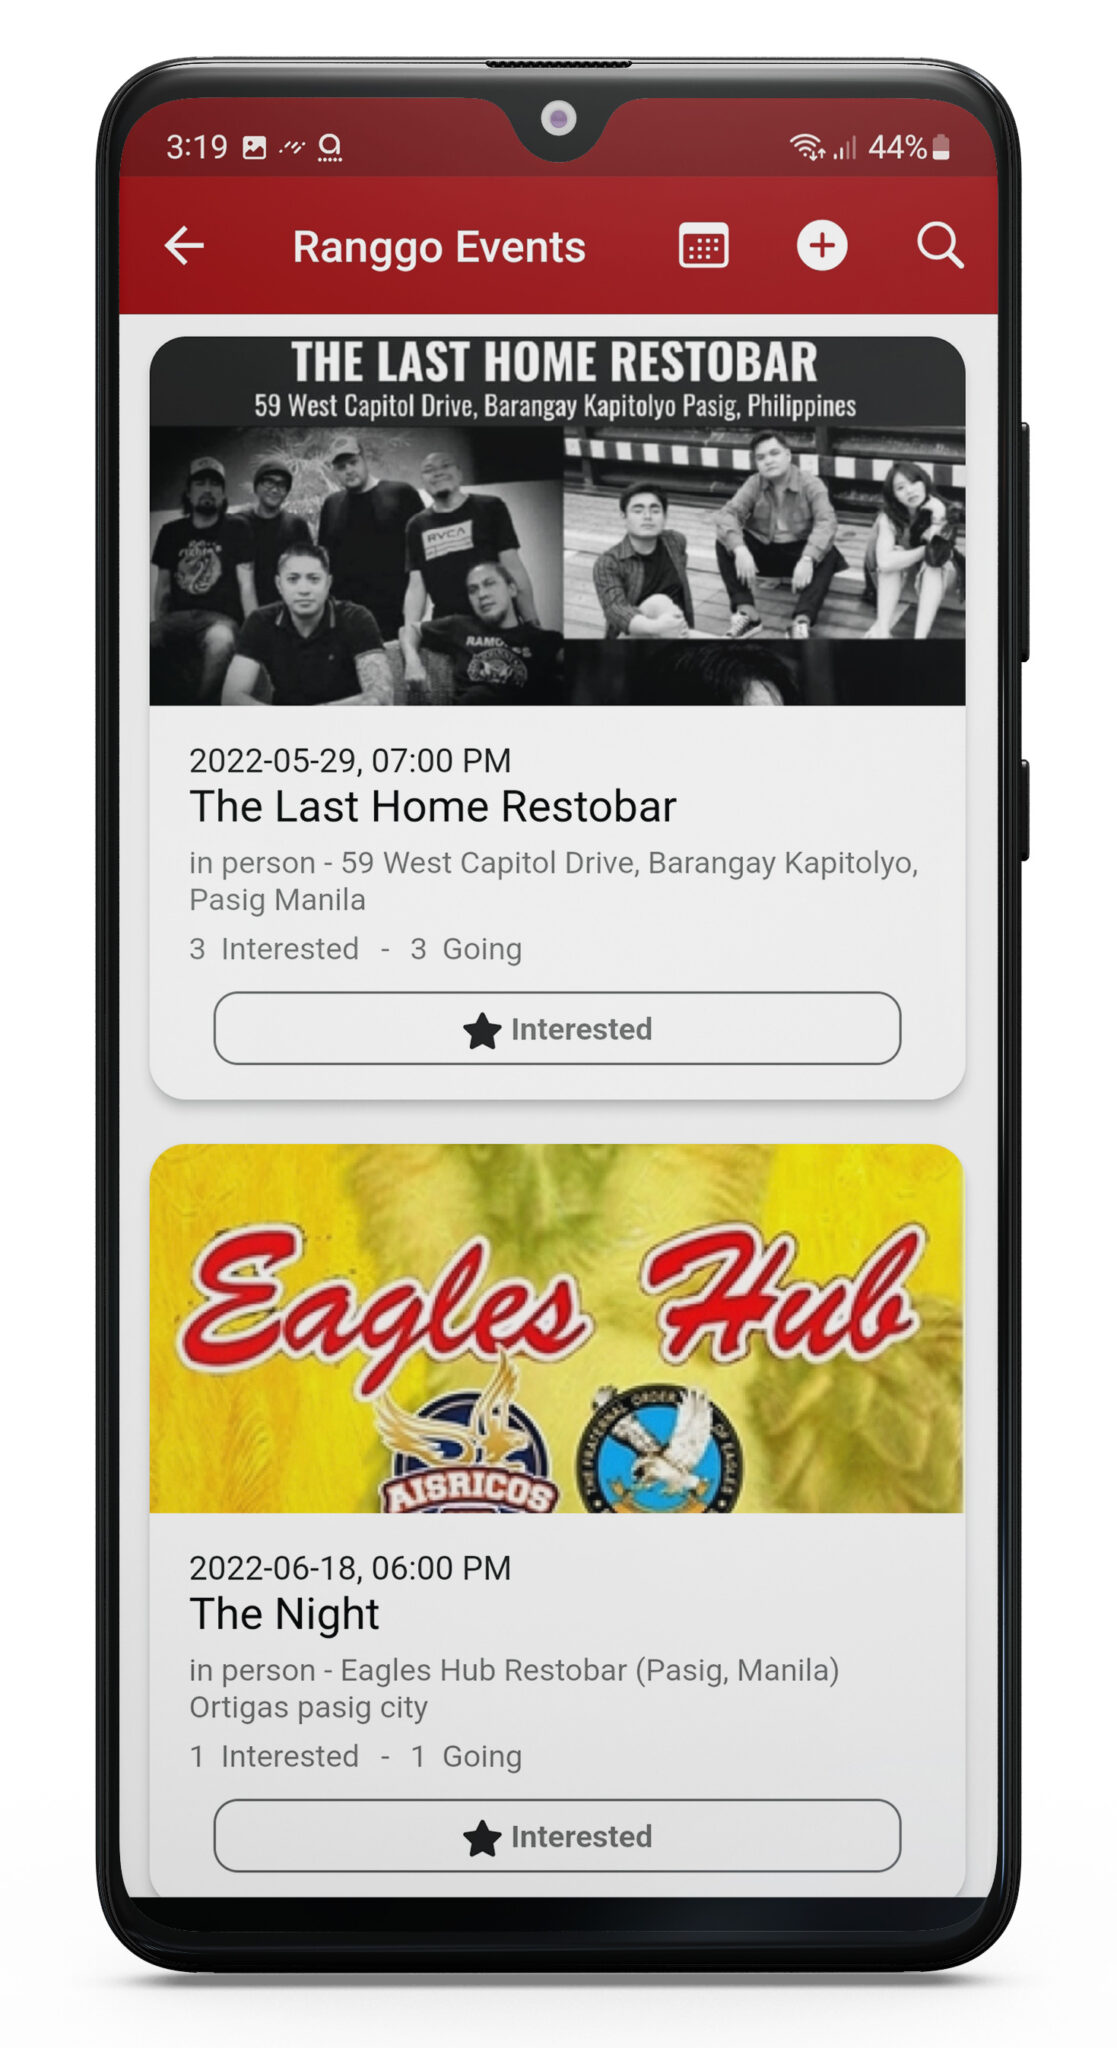
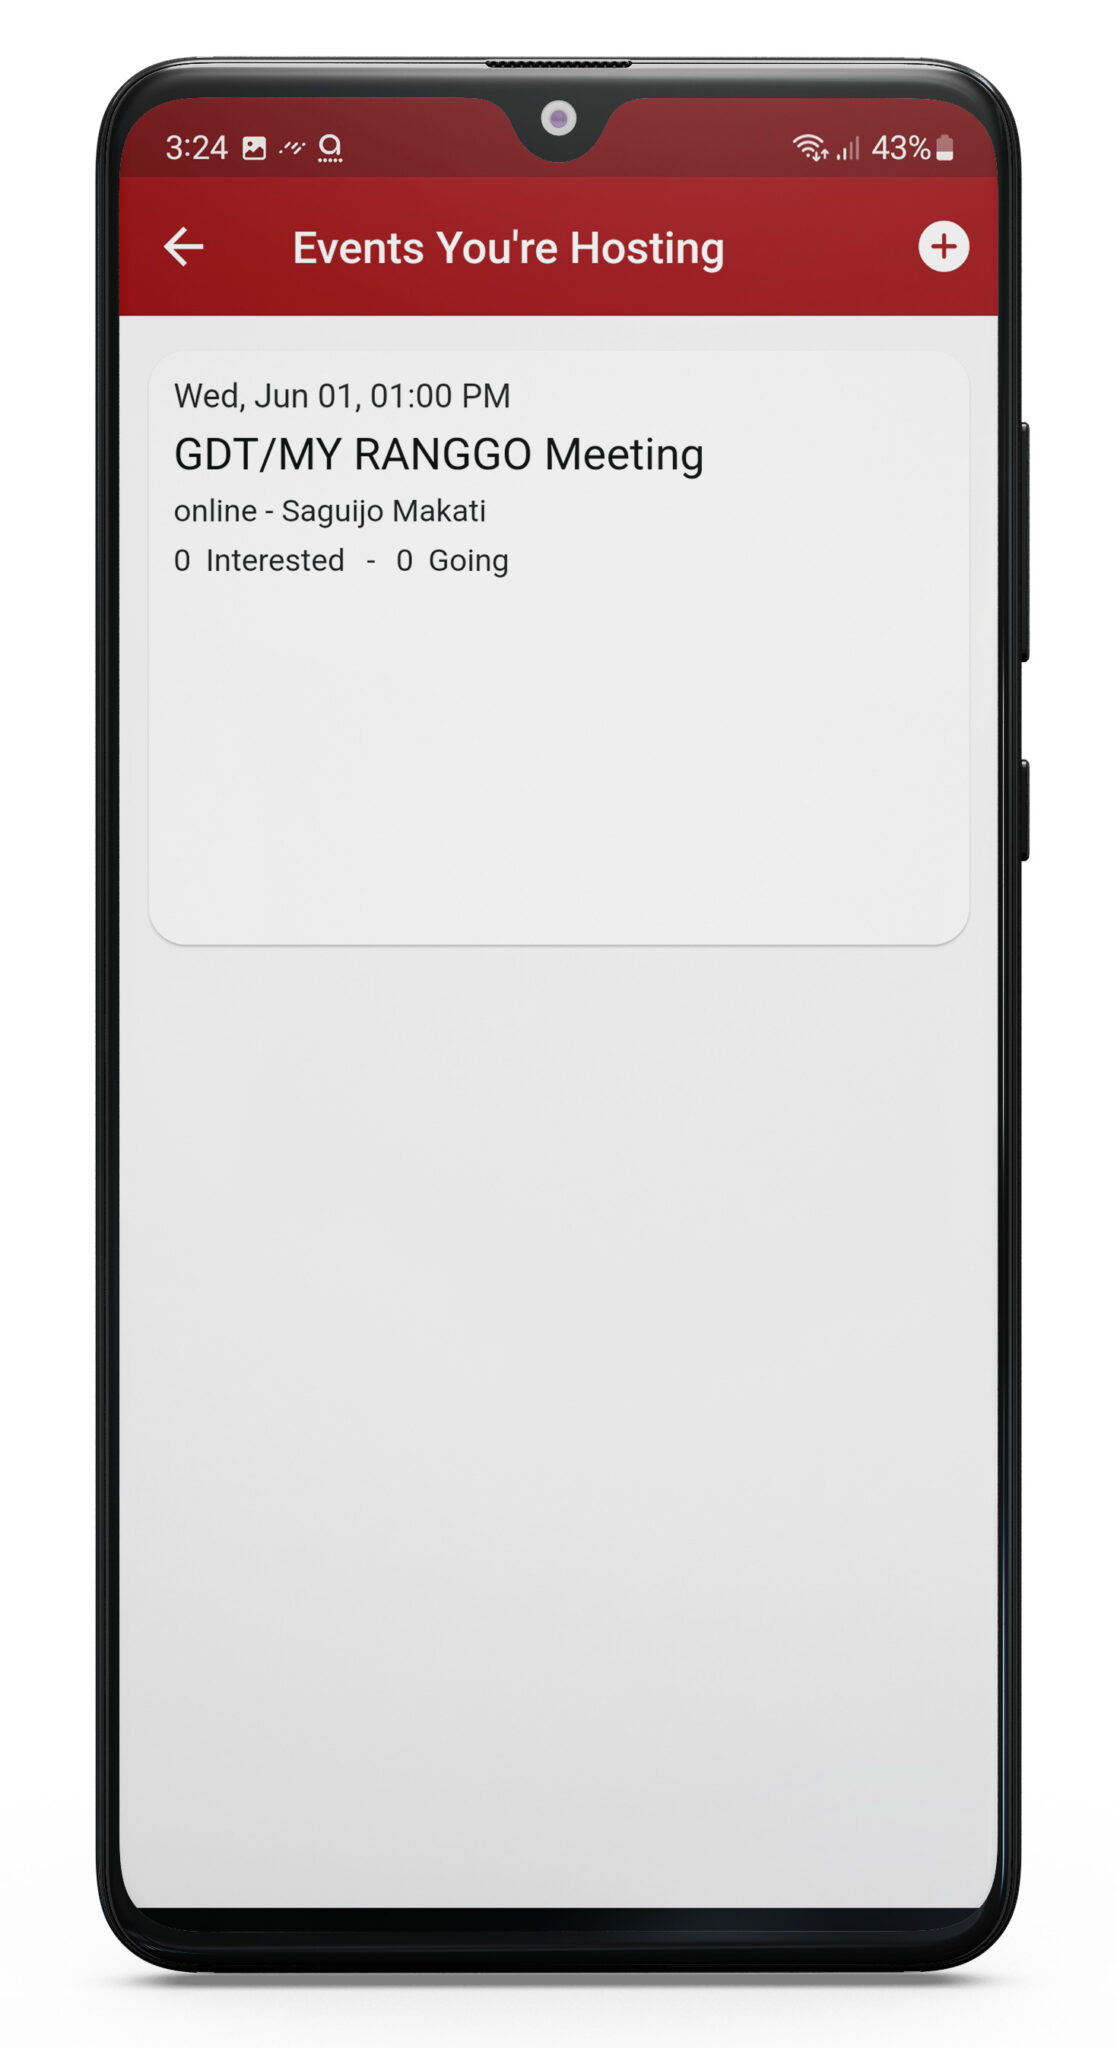
You will see other events that have already been listed or shared. To create an event, click the + button on the top red bar
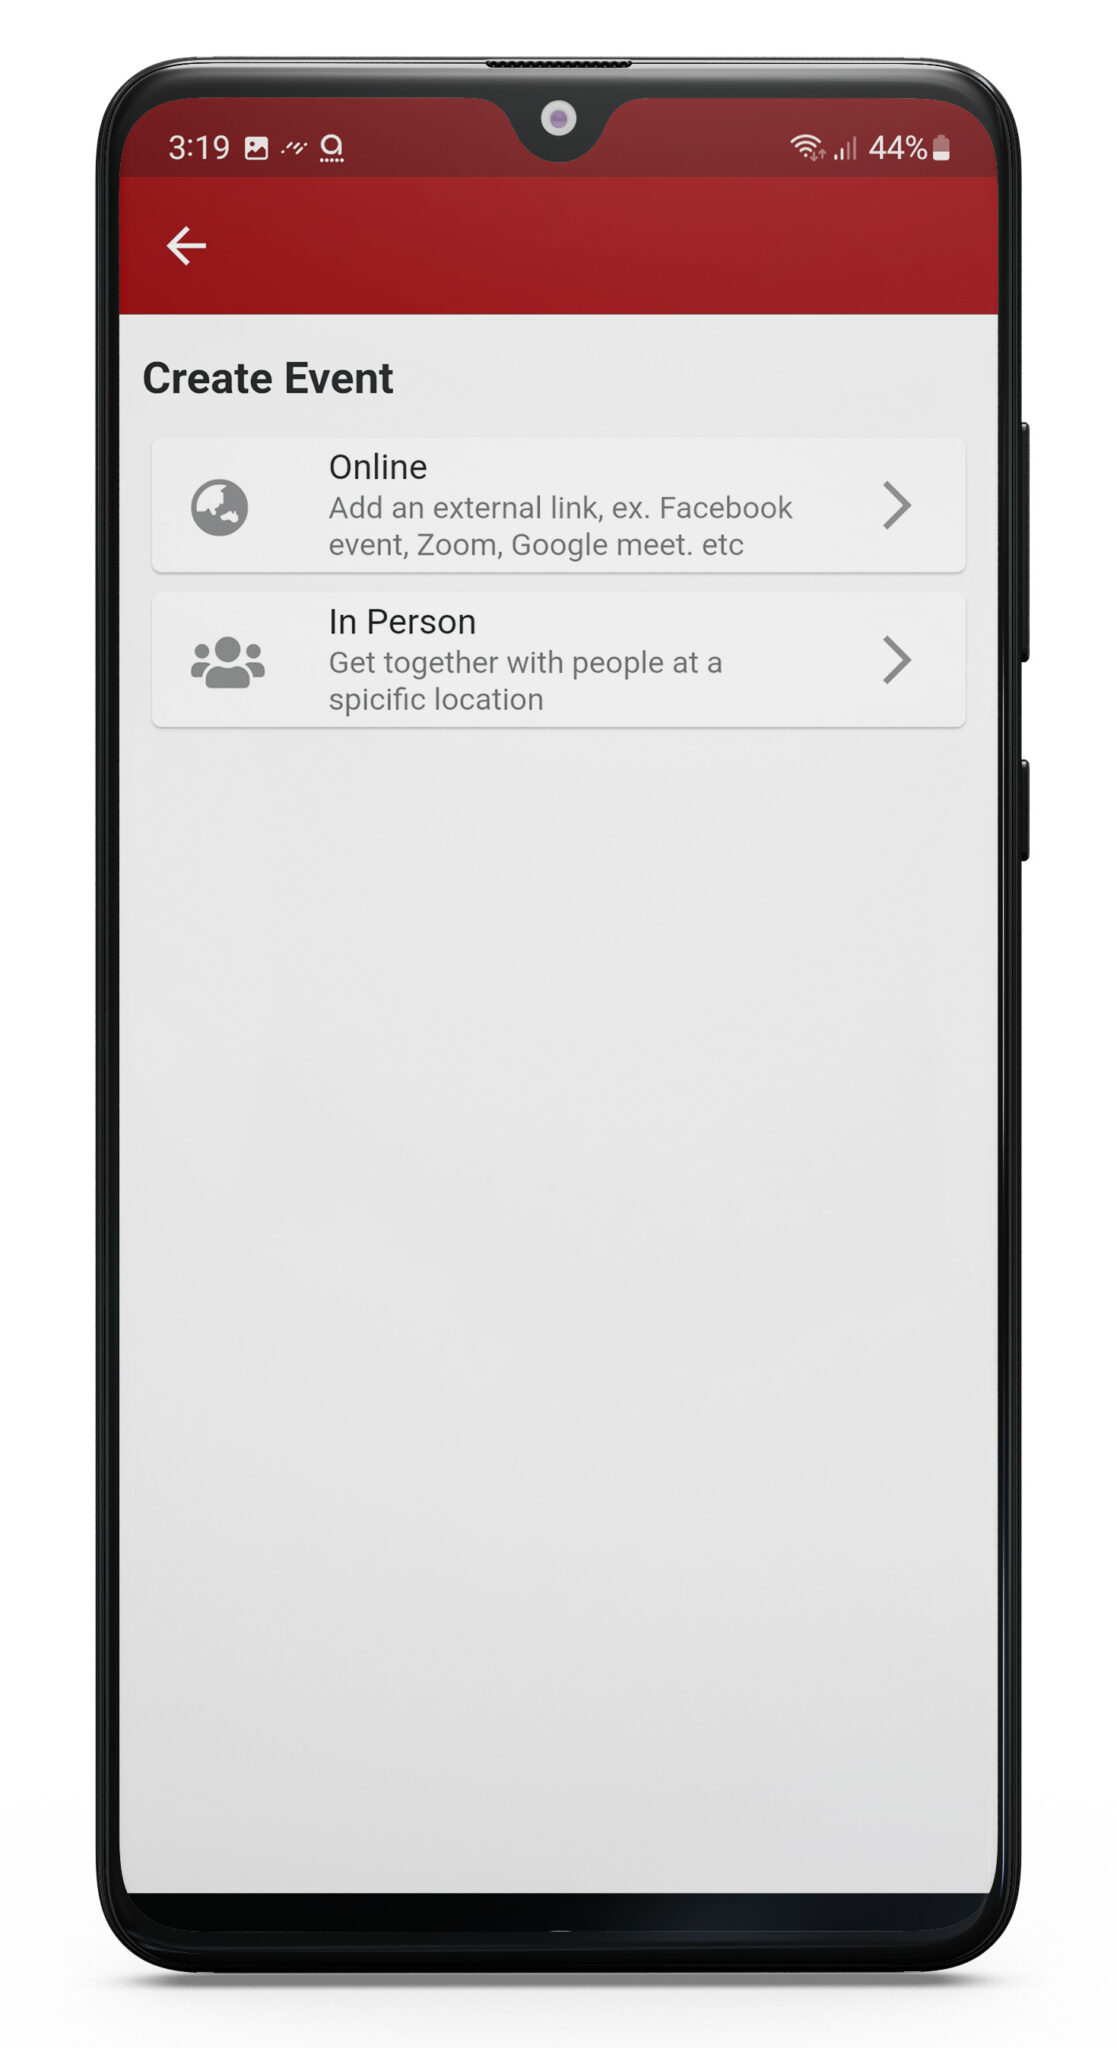
If you are creating or sharing an event which requires physical attendance, select In-Person.
If you are creating or sharing an event which is online, select Online.
How to create and share an In-Person Event:
1: First Name your event
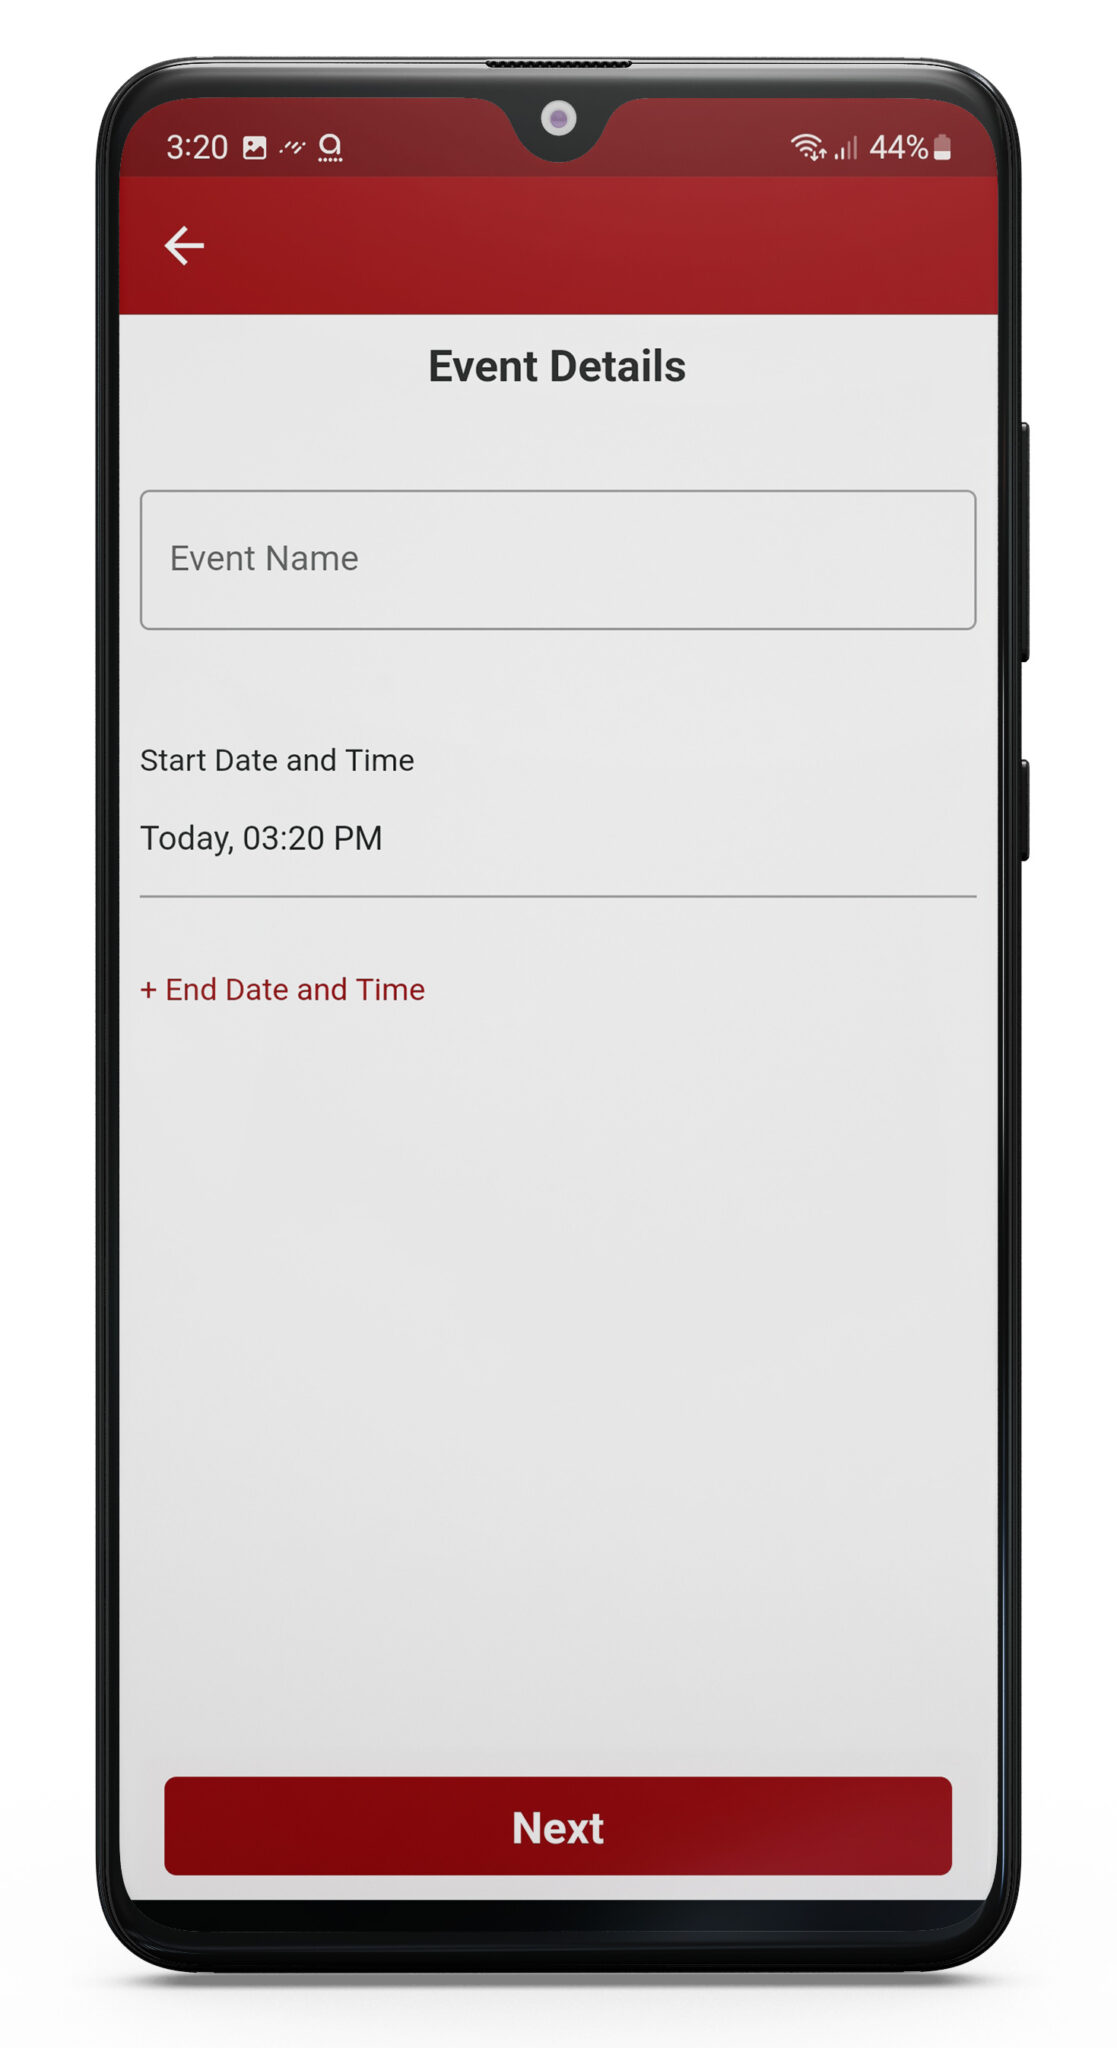
2: Then set the date and time

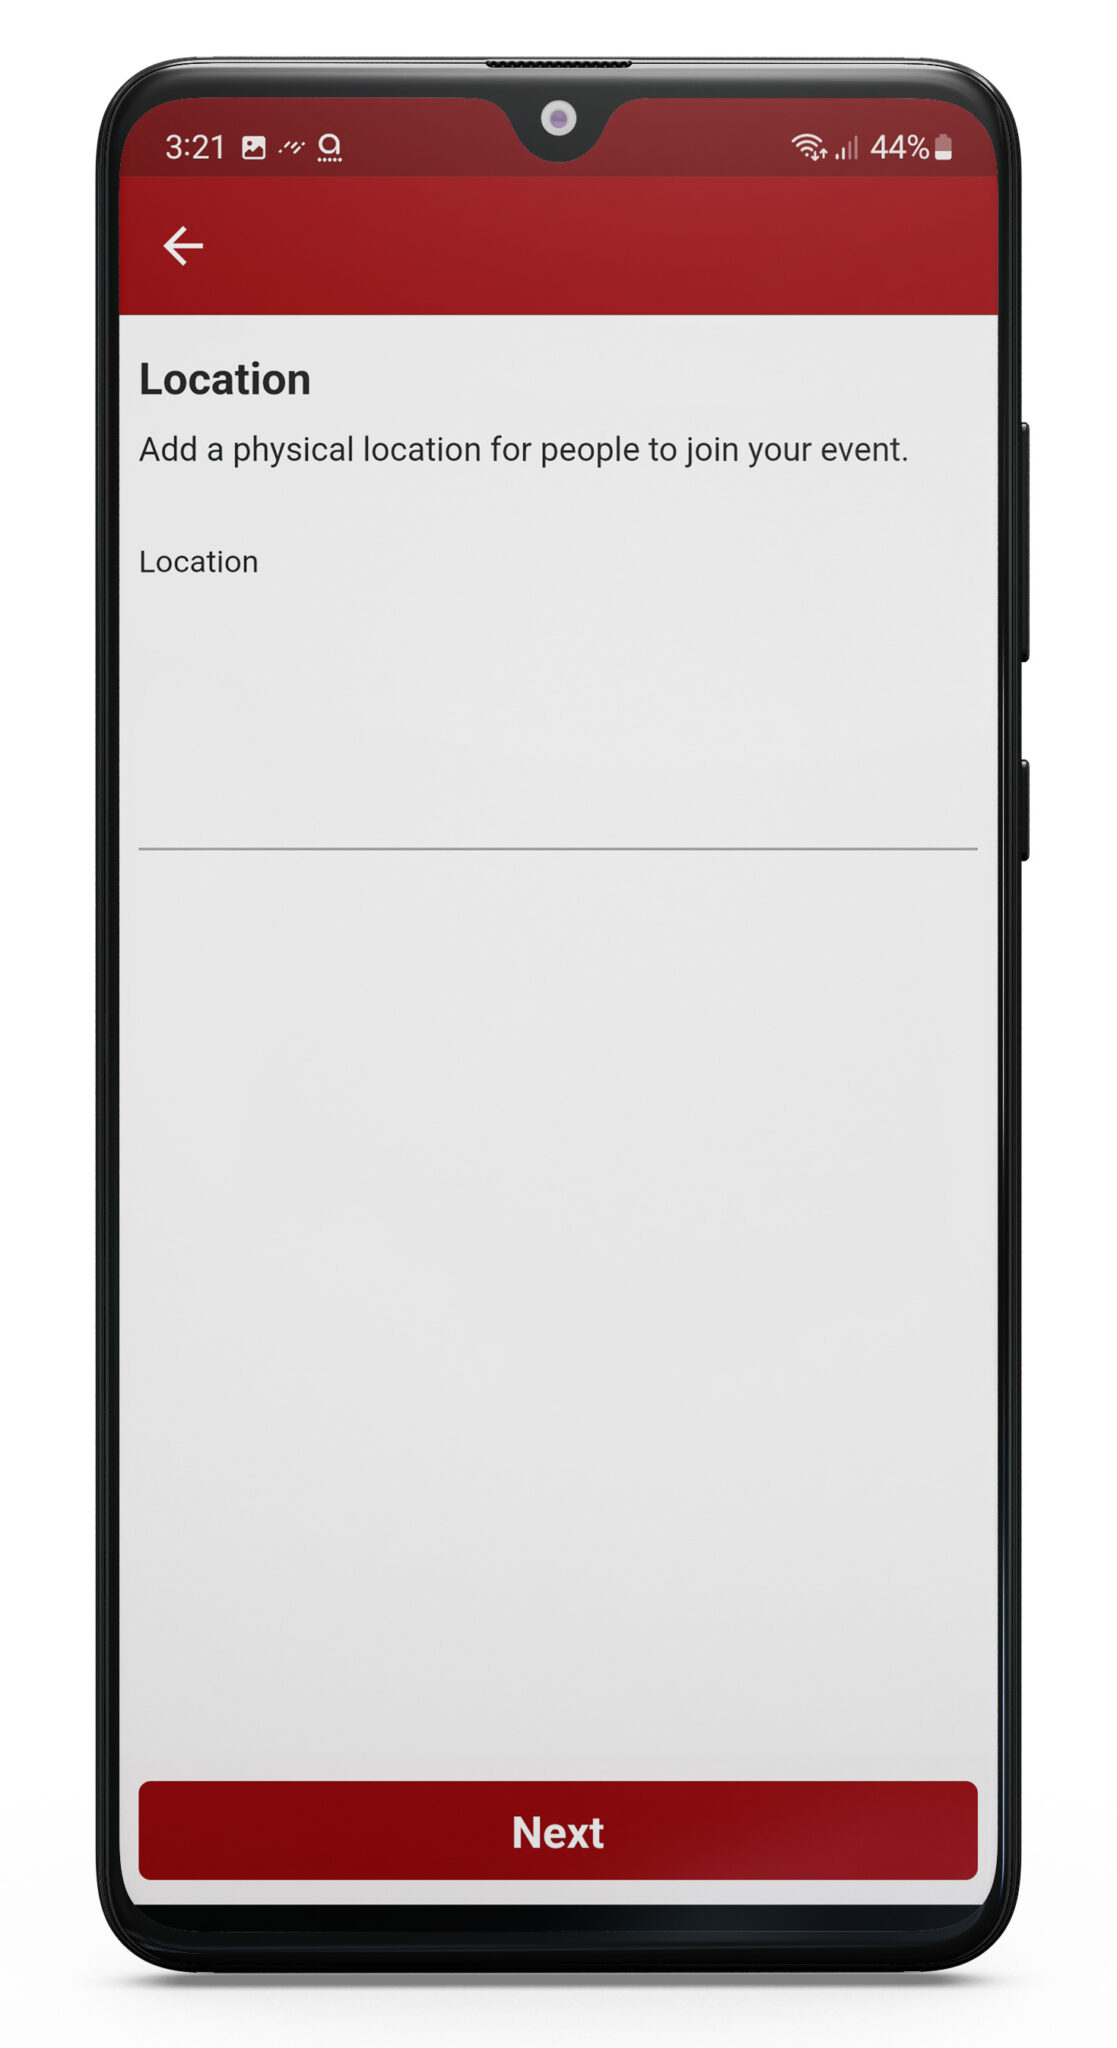
3: Next add the Location for your Event.
Add the name of the venue, the address and phone number or email address. Click Next.
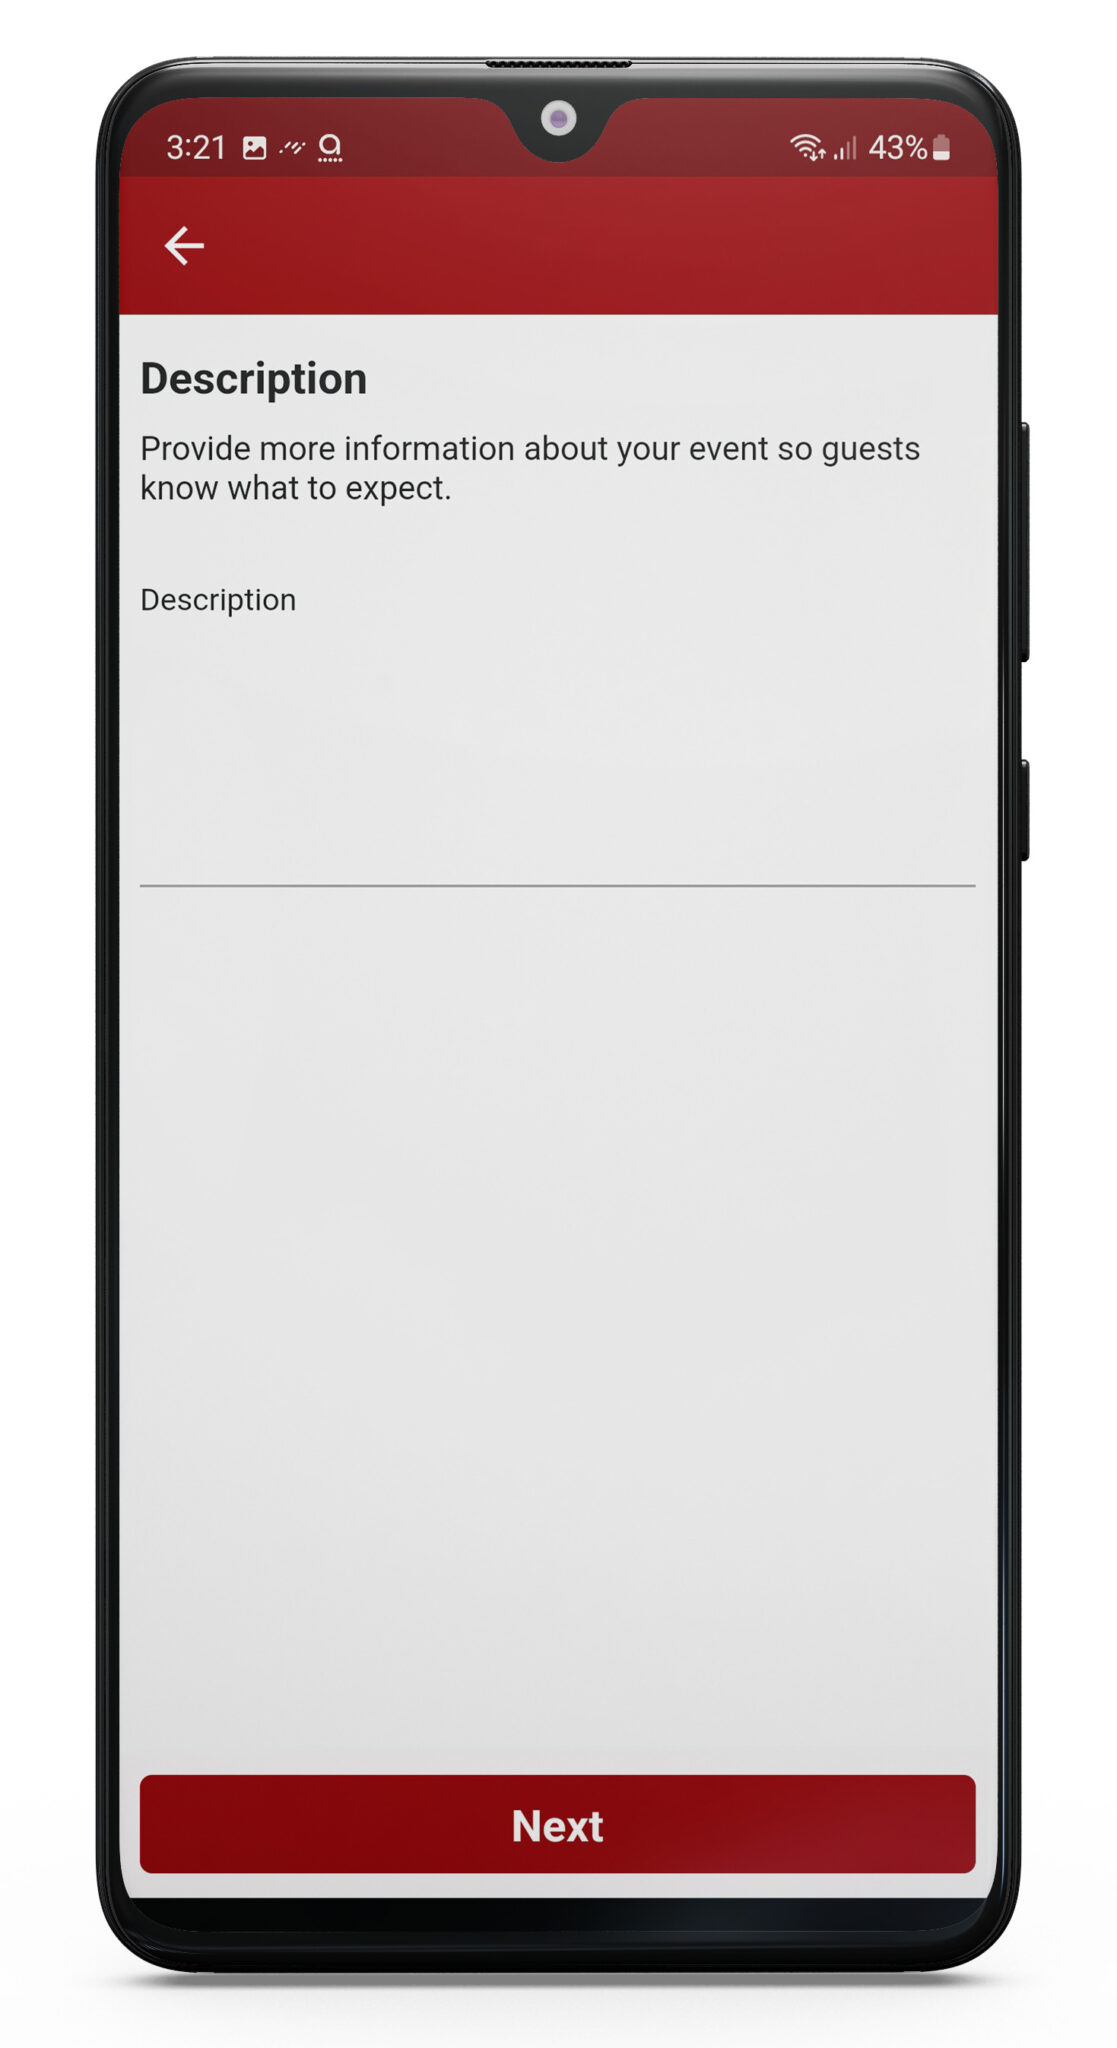
4: Add a description about the event and click next.
5: You can now add a photo and then select Create Event
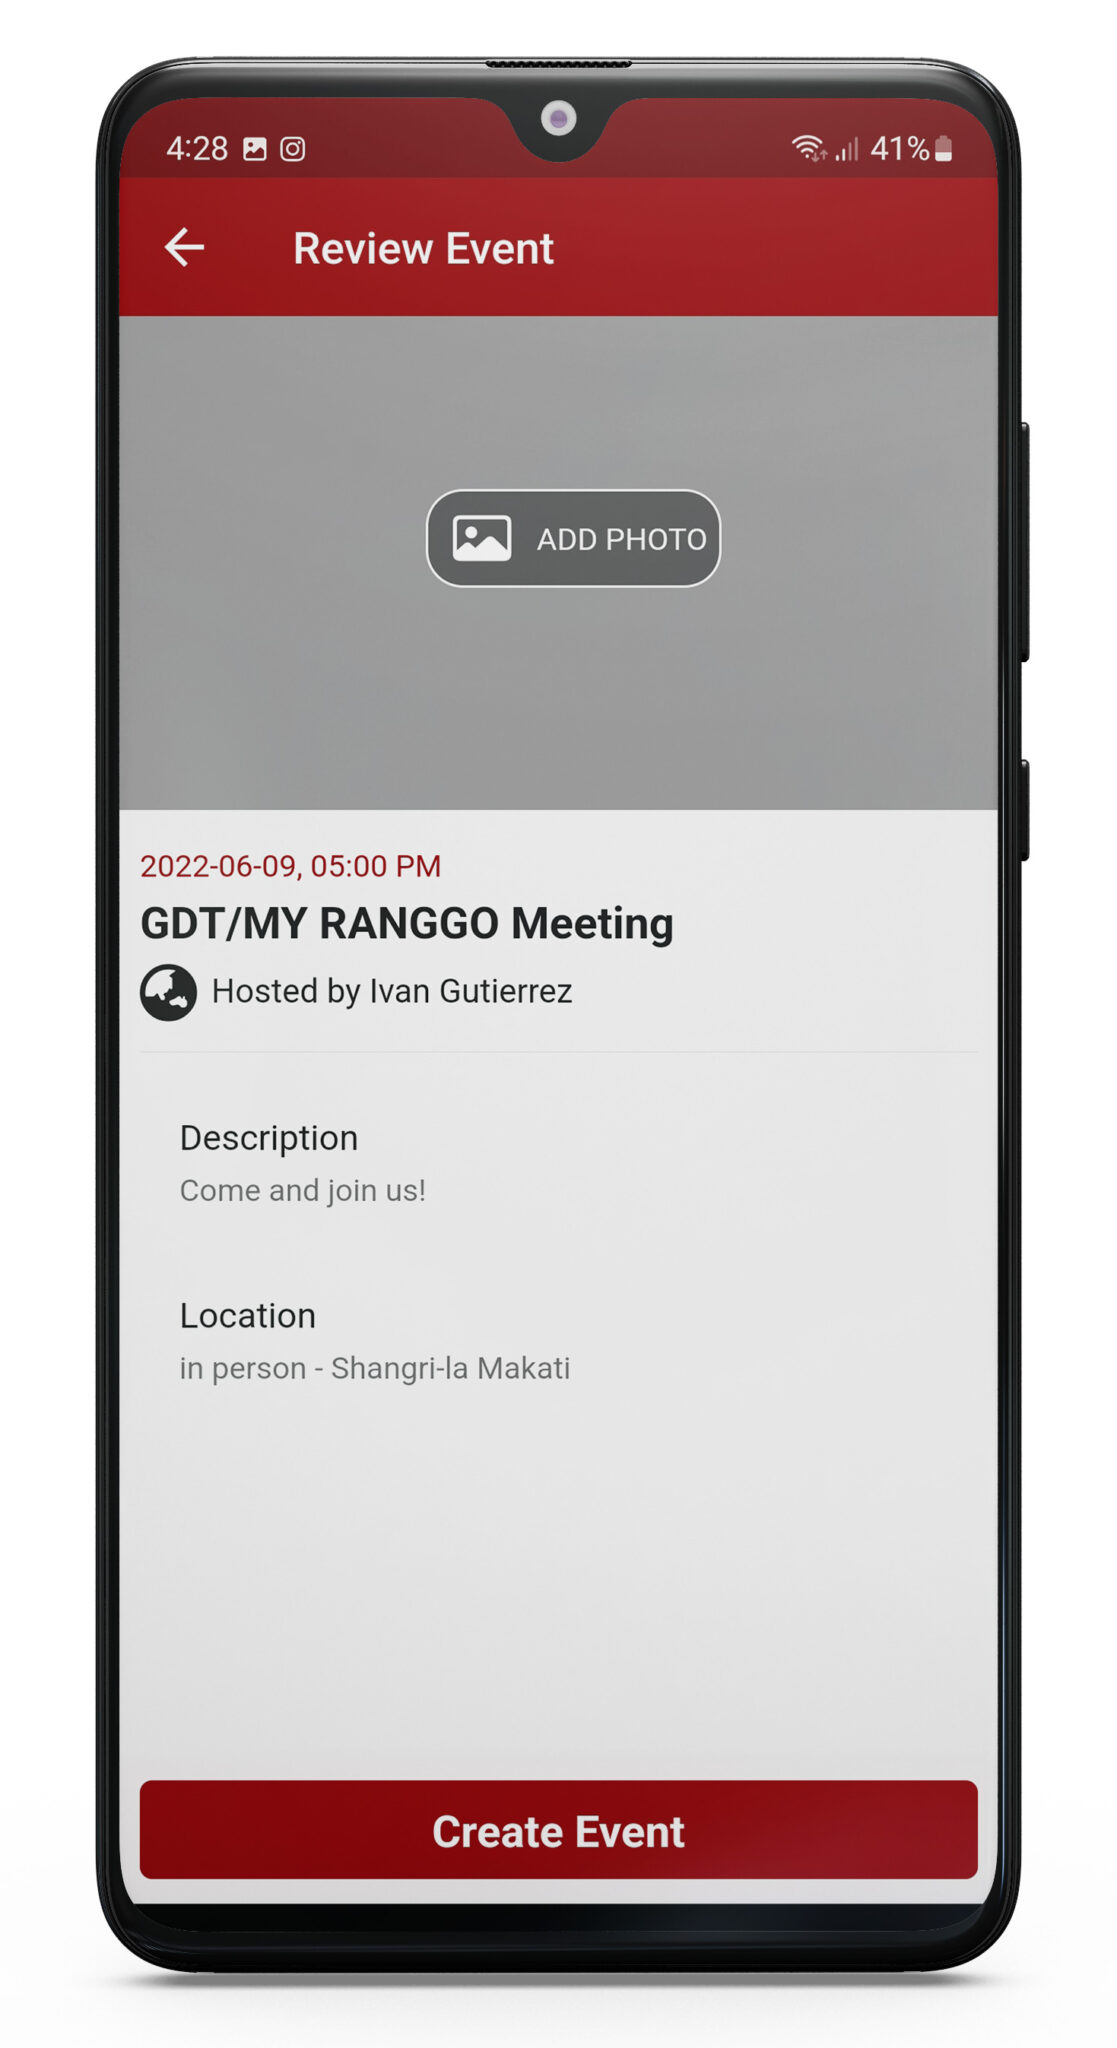
Congratulations you have created an event on RANGGO!
How to Create and Share an Online Event:
Follow steps 1 and 2 for creating an In-Person event
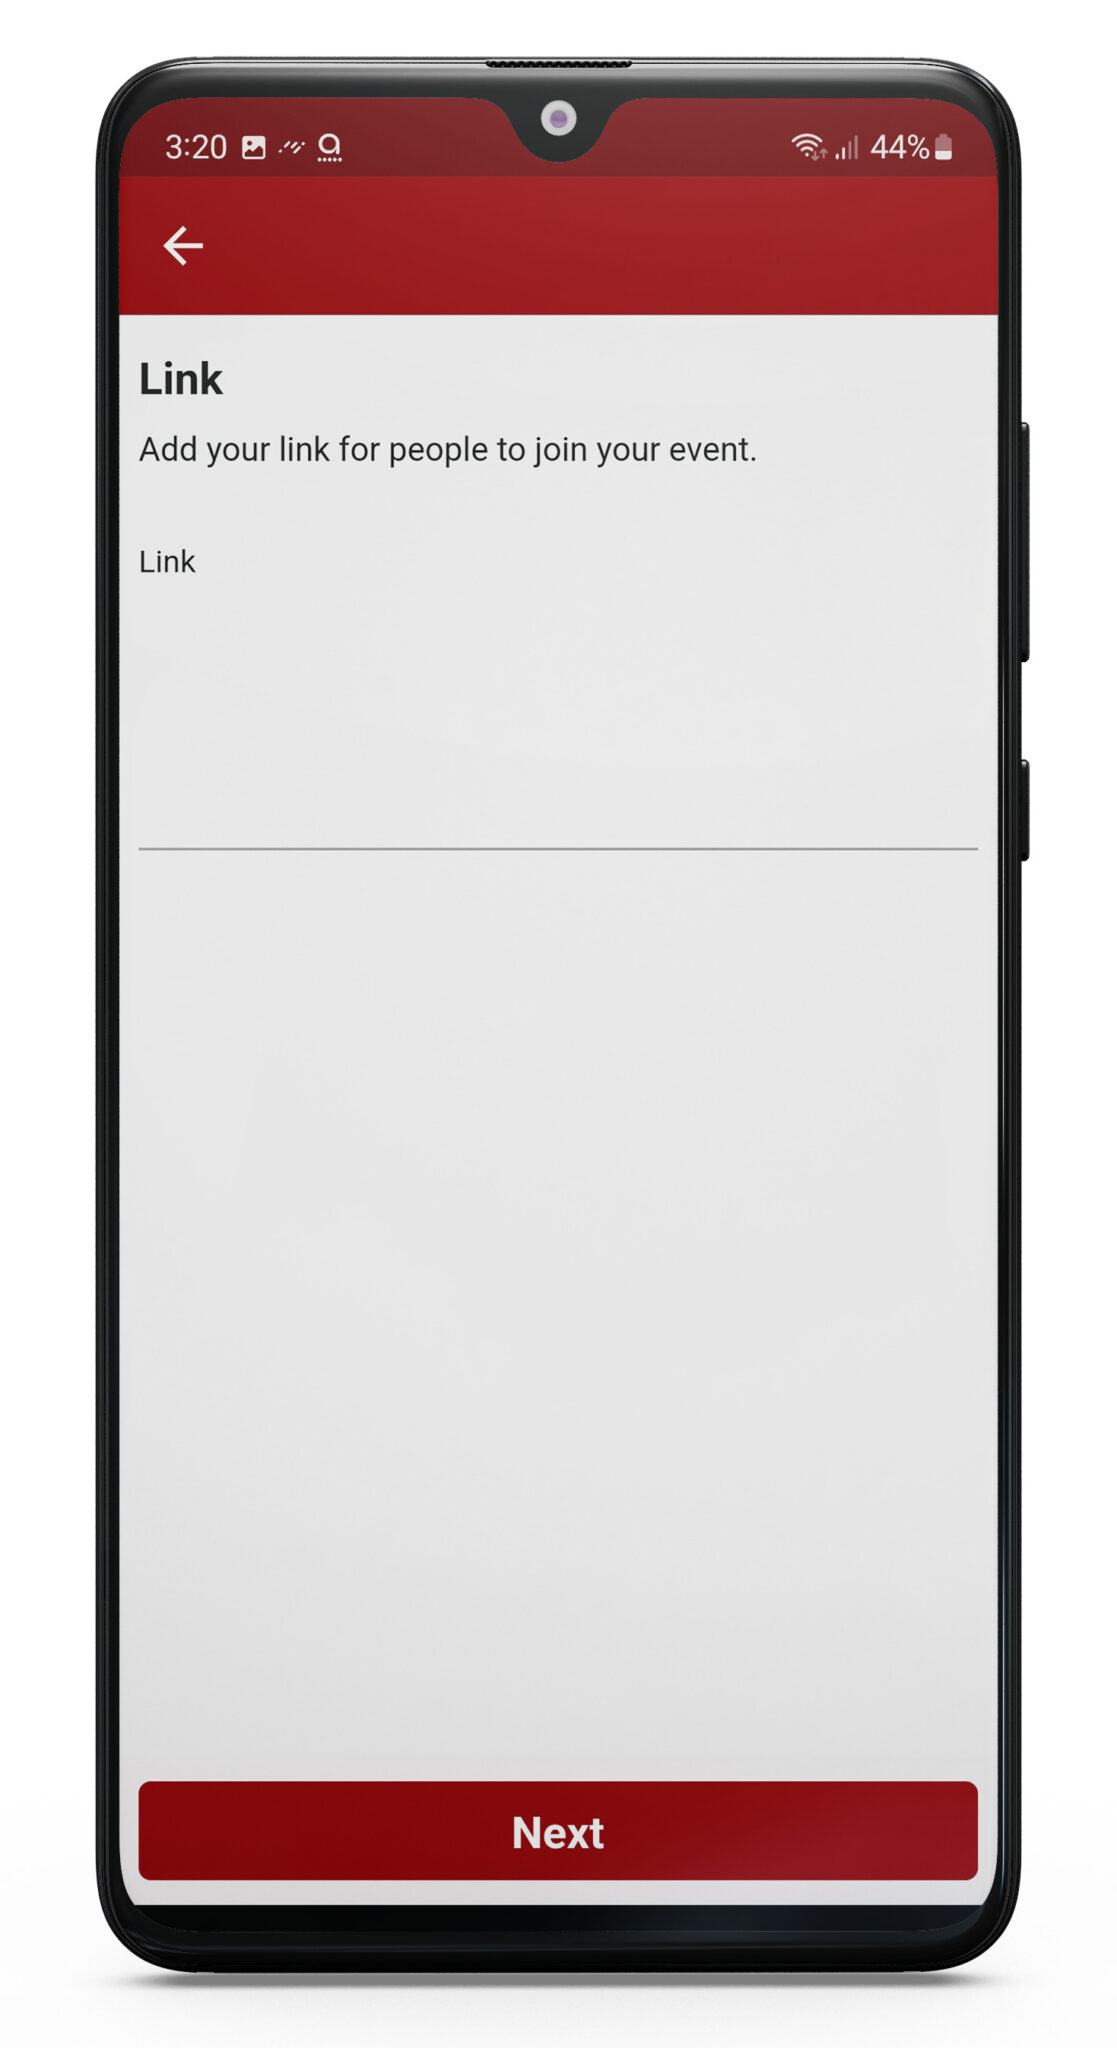
After you have added the Event Title, Date and Start time the next bit to complete is the link to the meeting.
This is where you add the Zoom, Google Meets or other online meeting URL people will need to join the event. Click next
Now just follow steps 3-5 given under the In-Person Event Set up.
It really is very simple to create and share events on the RANGGO App!
Get networking today!