

Everything you need to know to create a RANGGO Business Account. This guide includes:
- Downloading the App
- Signing Up using a Referral Code (from our Sales Team or a business colleague)
- Selecting the Subscriber Account
- Registering your Business & the steps to complete registration
- Completing your Business Profile (similar to creating your Business Facebook Profile)
- Adding Branches (if you have the same business in other locations)
We can’t wait to have you join the RANGGO movement! Follow these simple steps and create your Business Account today.
Downloading the RANGGO App
1. Visit the RANGGO App page on Apple or Play Store, or scan the QR Codes below to download the App

2. Before selecting Install go to the three dots in the top right and click on ‘Allow Automatic Updates’ first.
Once the App is installed on your phone you are ready to create your RANGGO Business Account.
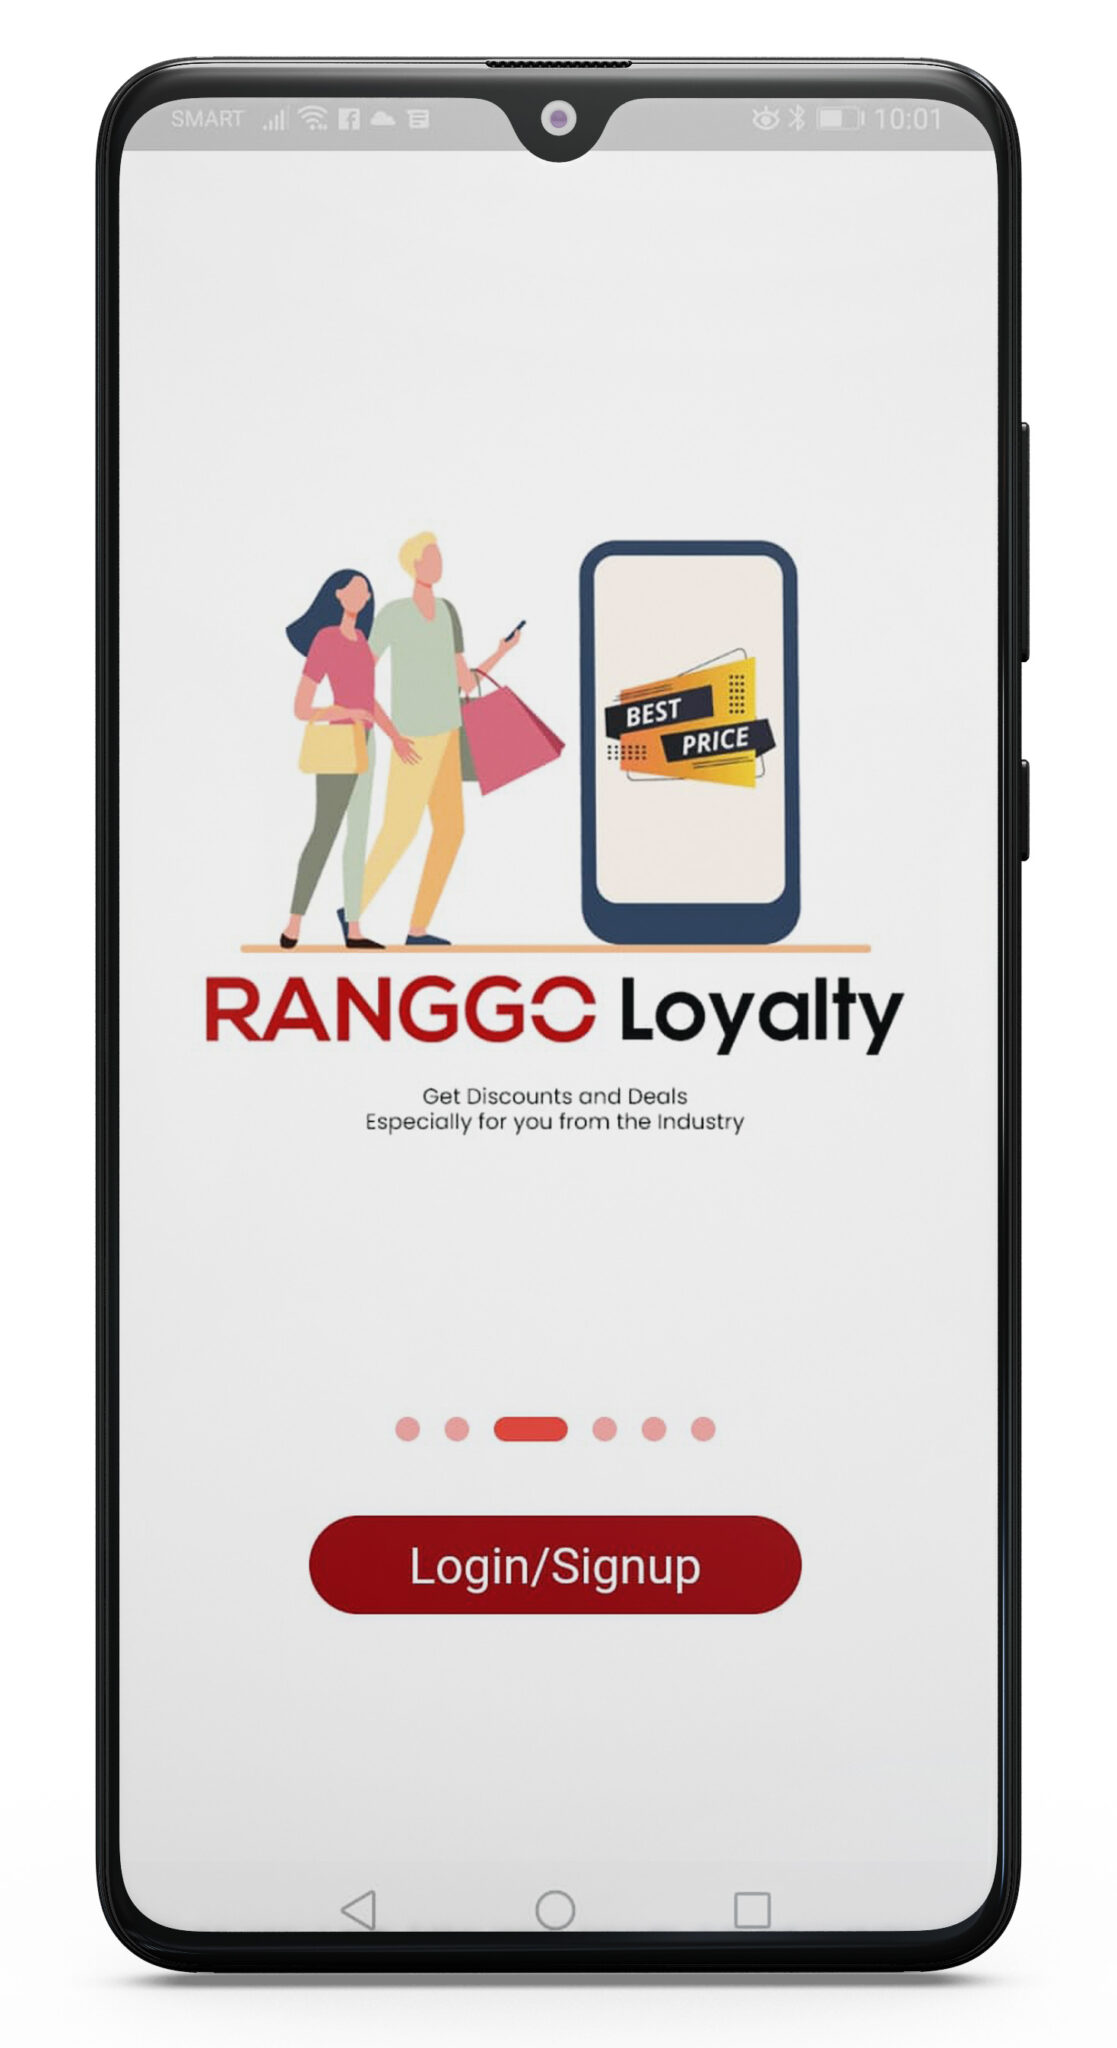
3. Click on the App to open it and select Sign-up then click Continue
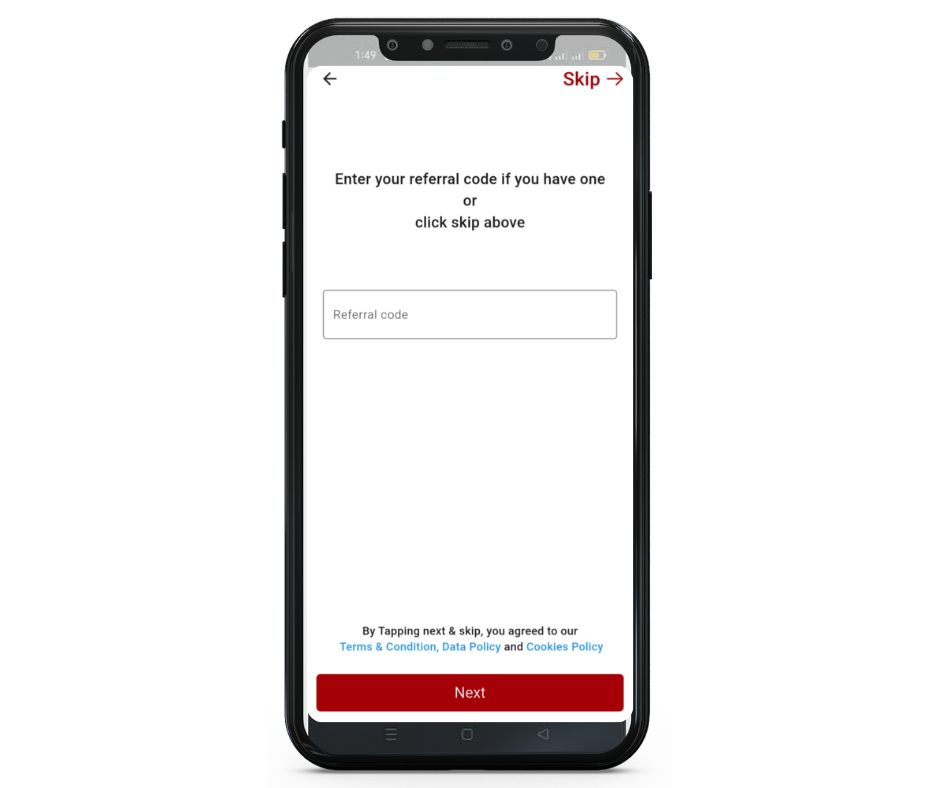
4. If you have a reference number from a friend who has recommended the RANGGO App, you can add it to this next page and click Next. Otherwise, select Skip.
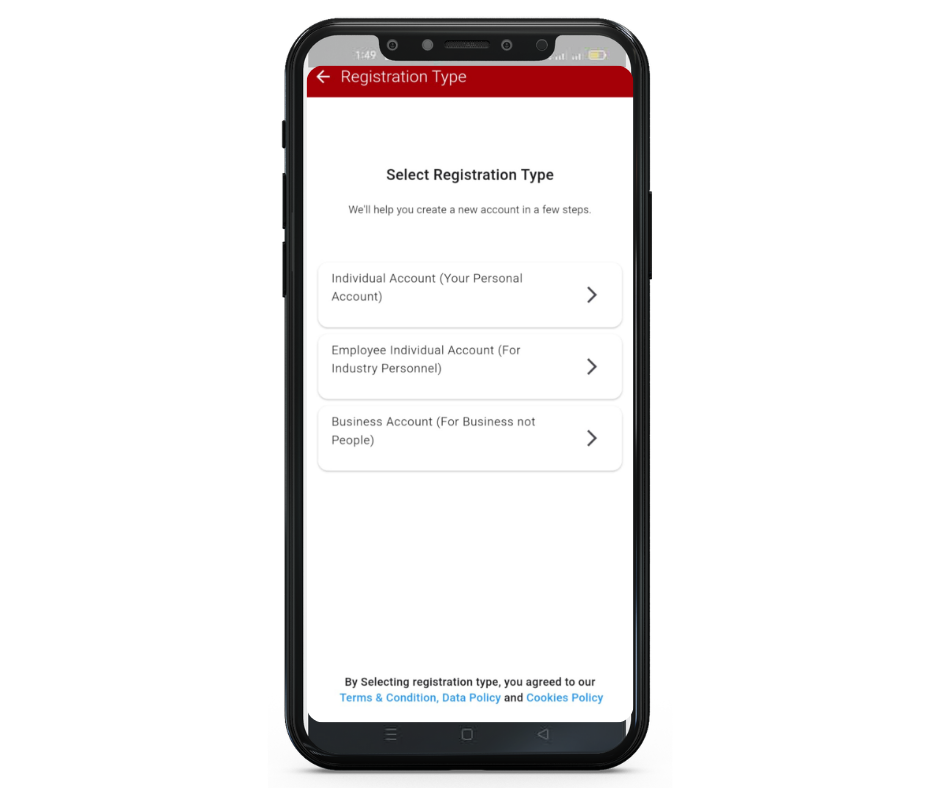
4. Now choose your Account Type. You should select the Business Account Option.
5. Next Type in the Name of your Company and click Next. It is important to use your Company Name if you have more than one establishment.
If your company is part of a Franchise (& you only own one) we recommend you add the location to the end of the Company Name. This will make it easier for customers to find your branch when searching.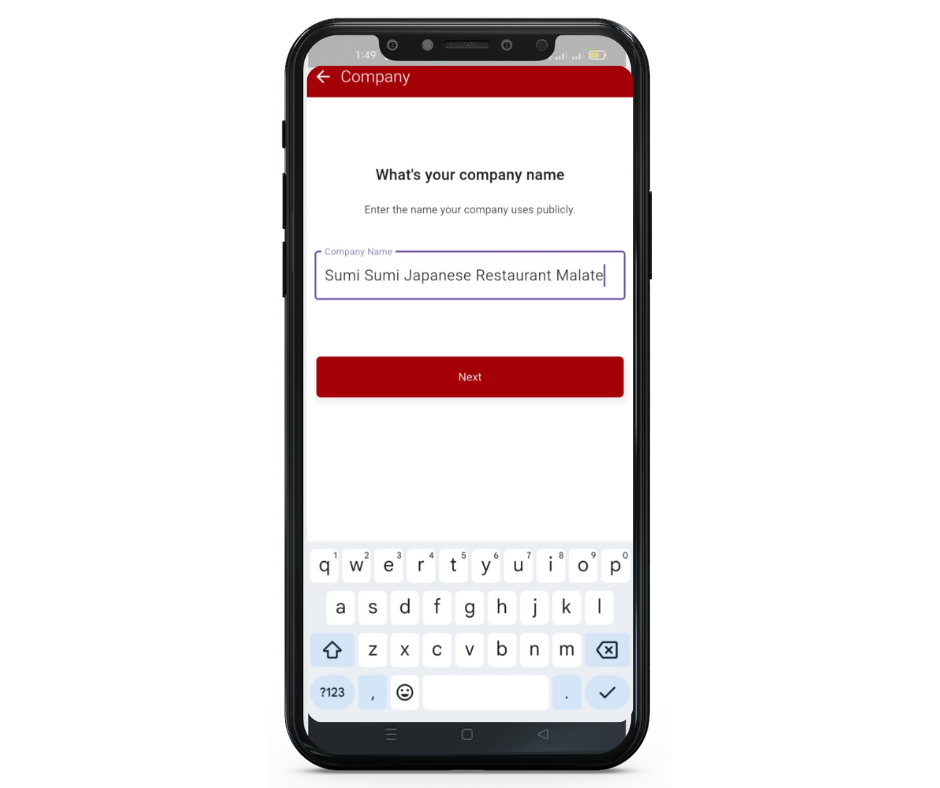
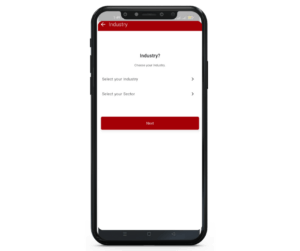
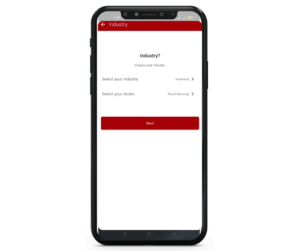
6. You now need to select the Industry (Hospitality) and the Sector your business comes under.
For example: if you have a restaurant or bar you should select Hospitality and then Food & Beverage from the options.


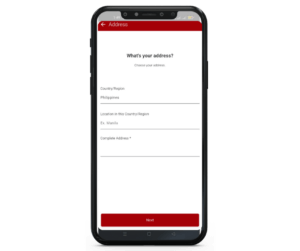
7. Add your establishment Address and click Next.


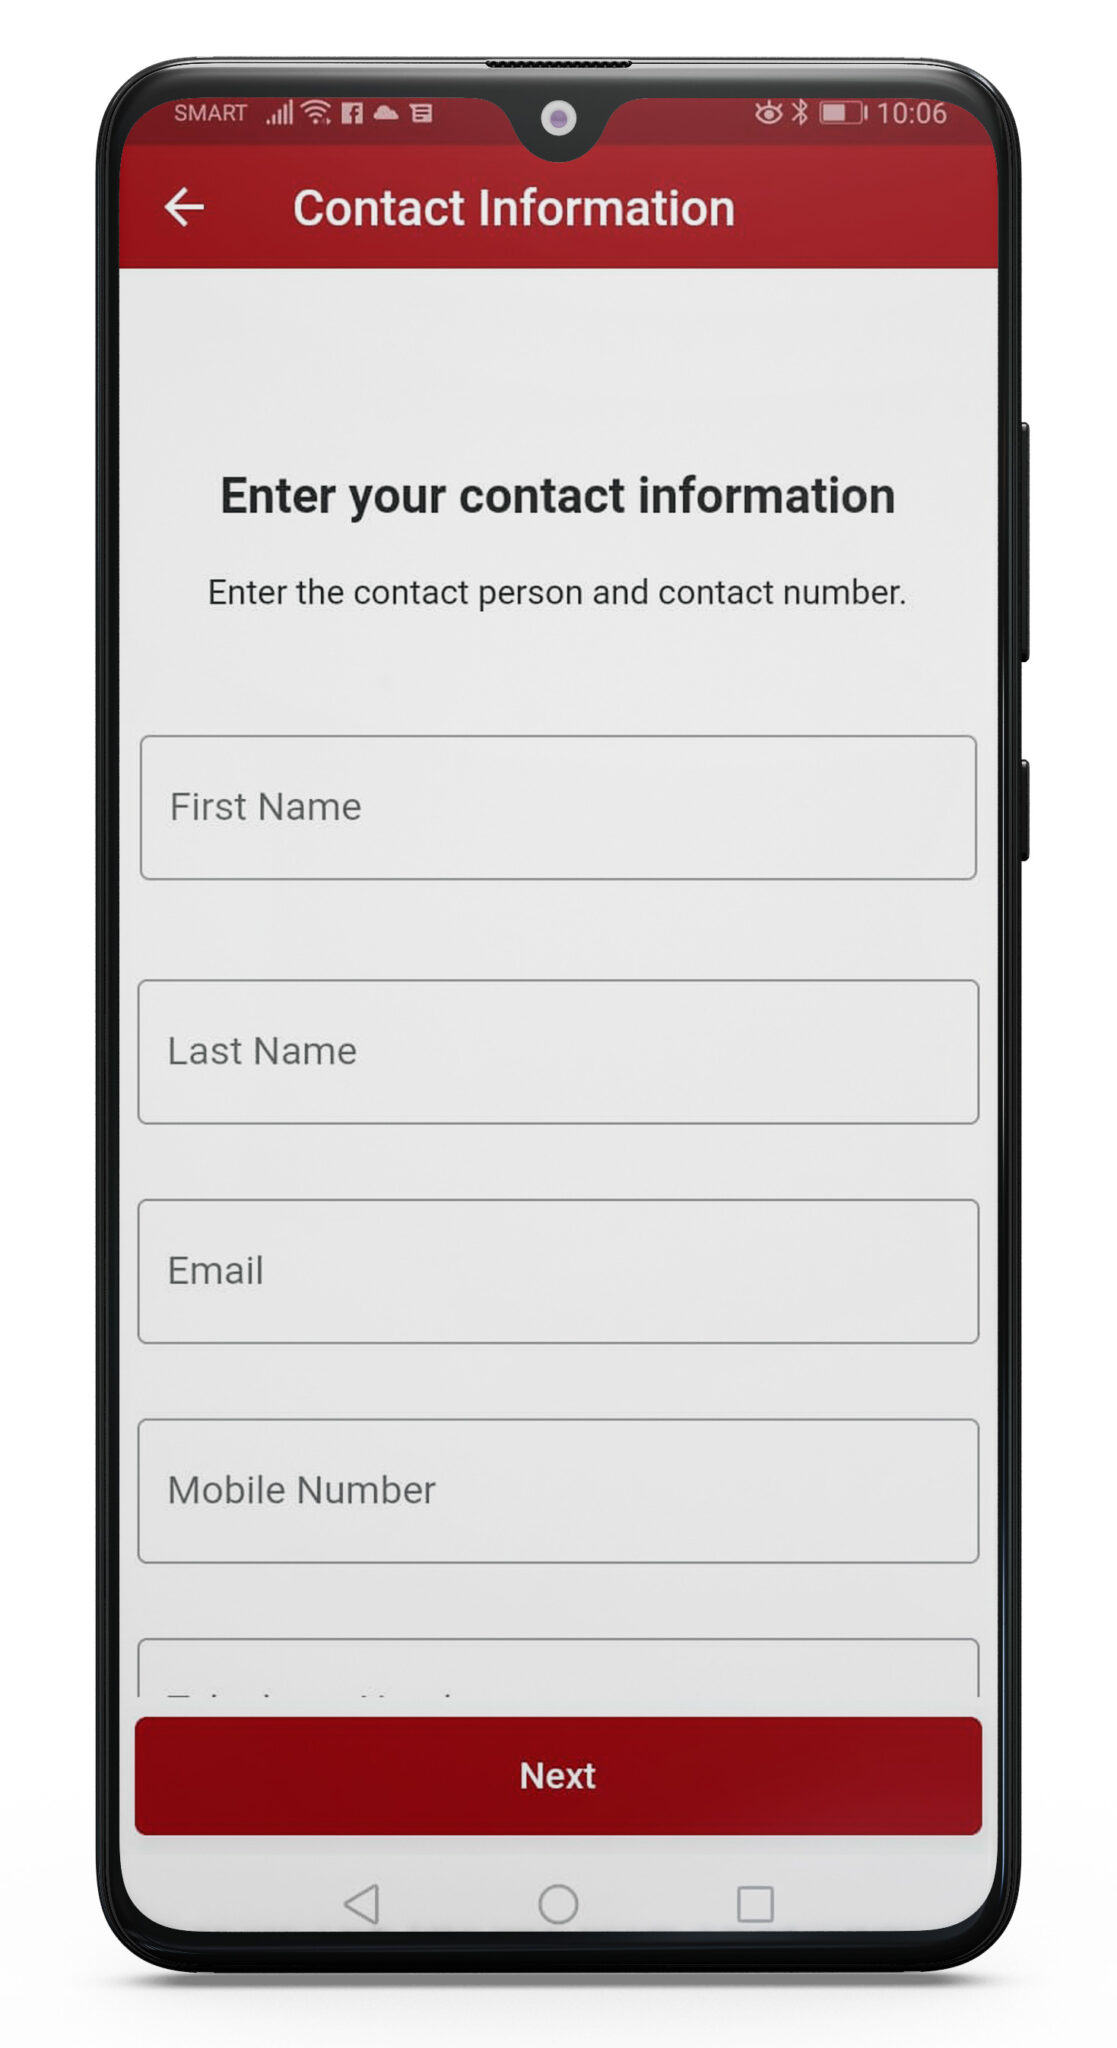
8. Complete the Contact Information for the person who owns or manages the business. They should be the person who will manage your RANGGO Account. Click Next
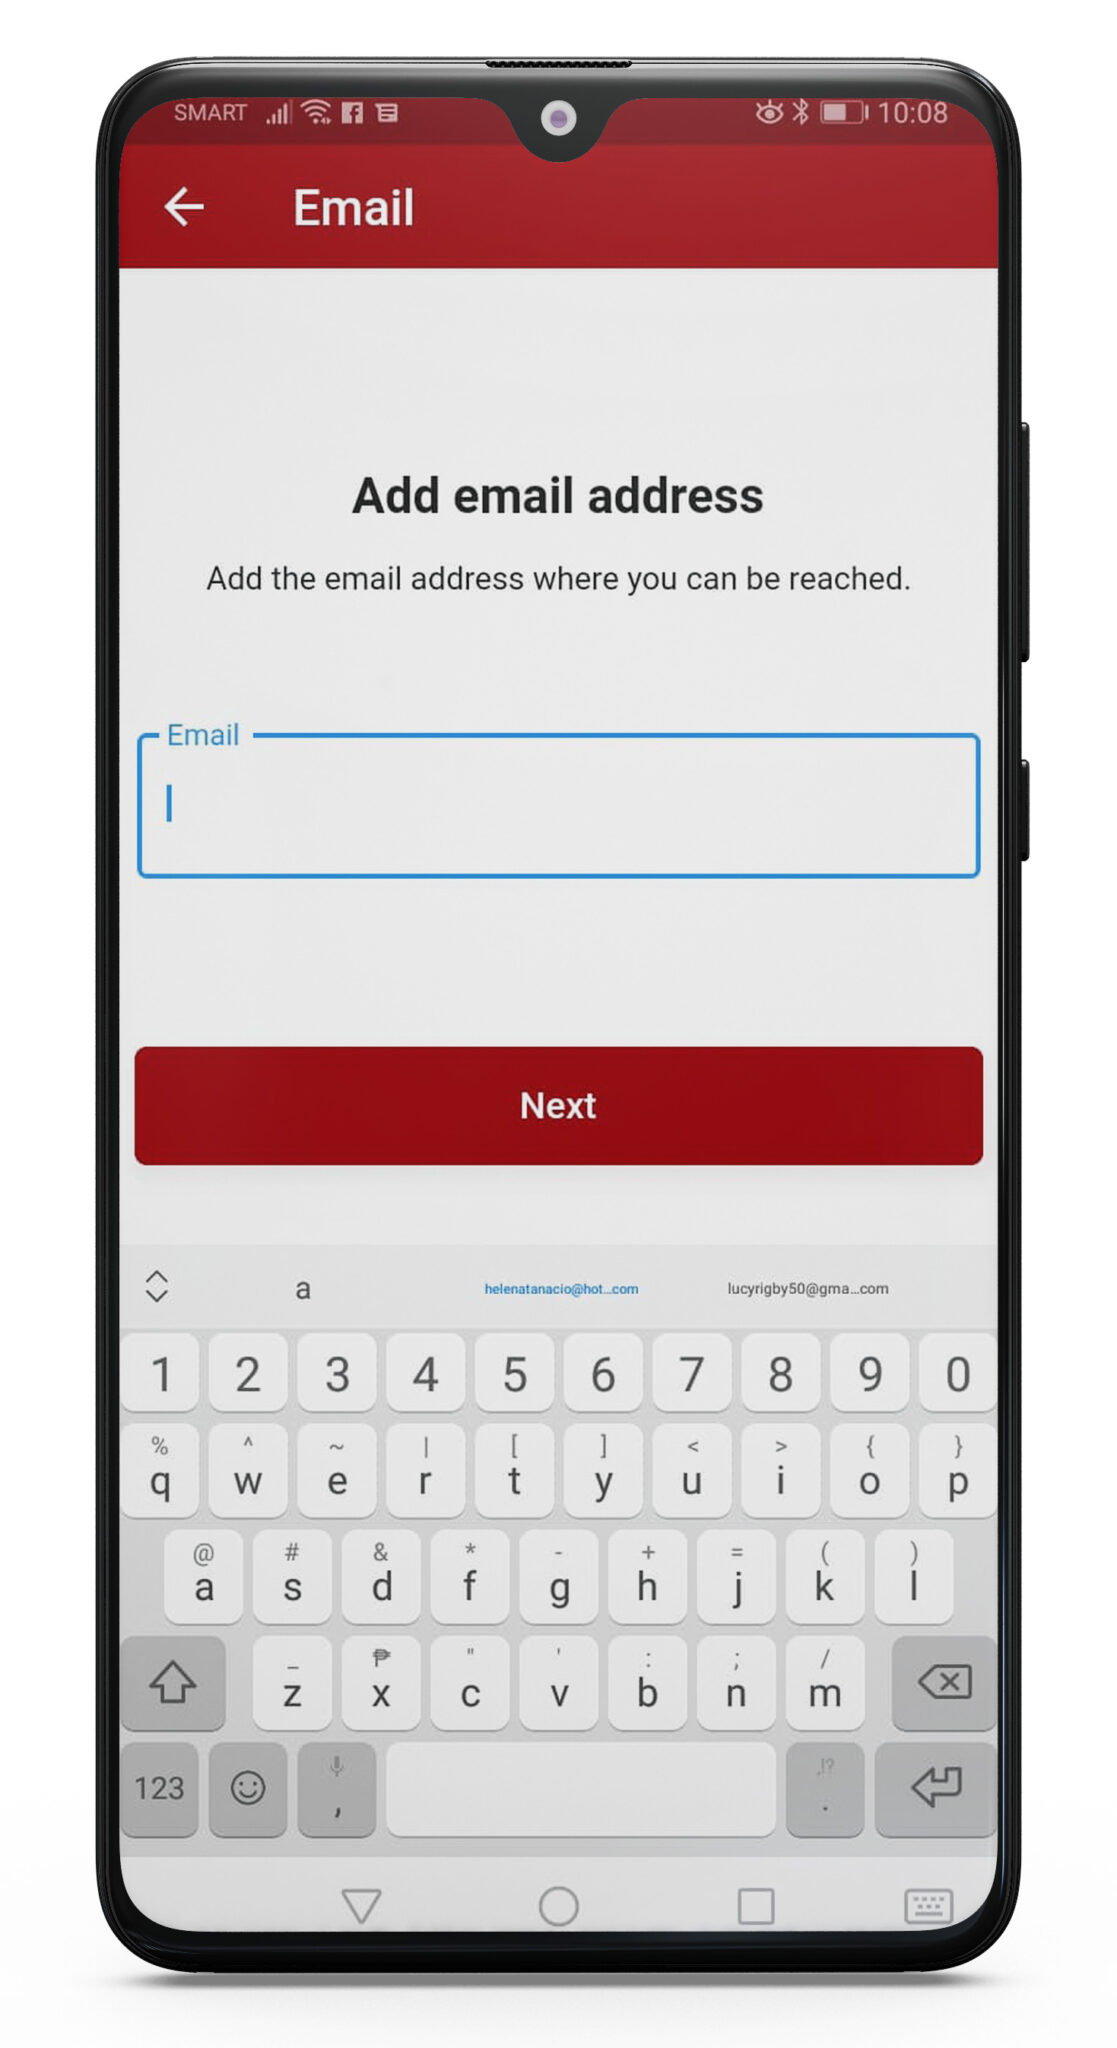
9. Next Add your Business email address and click Next.
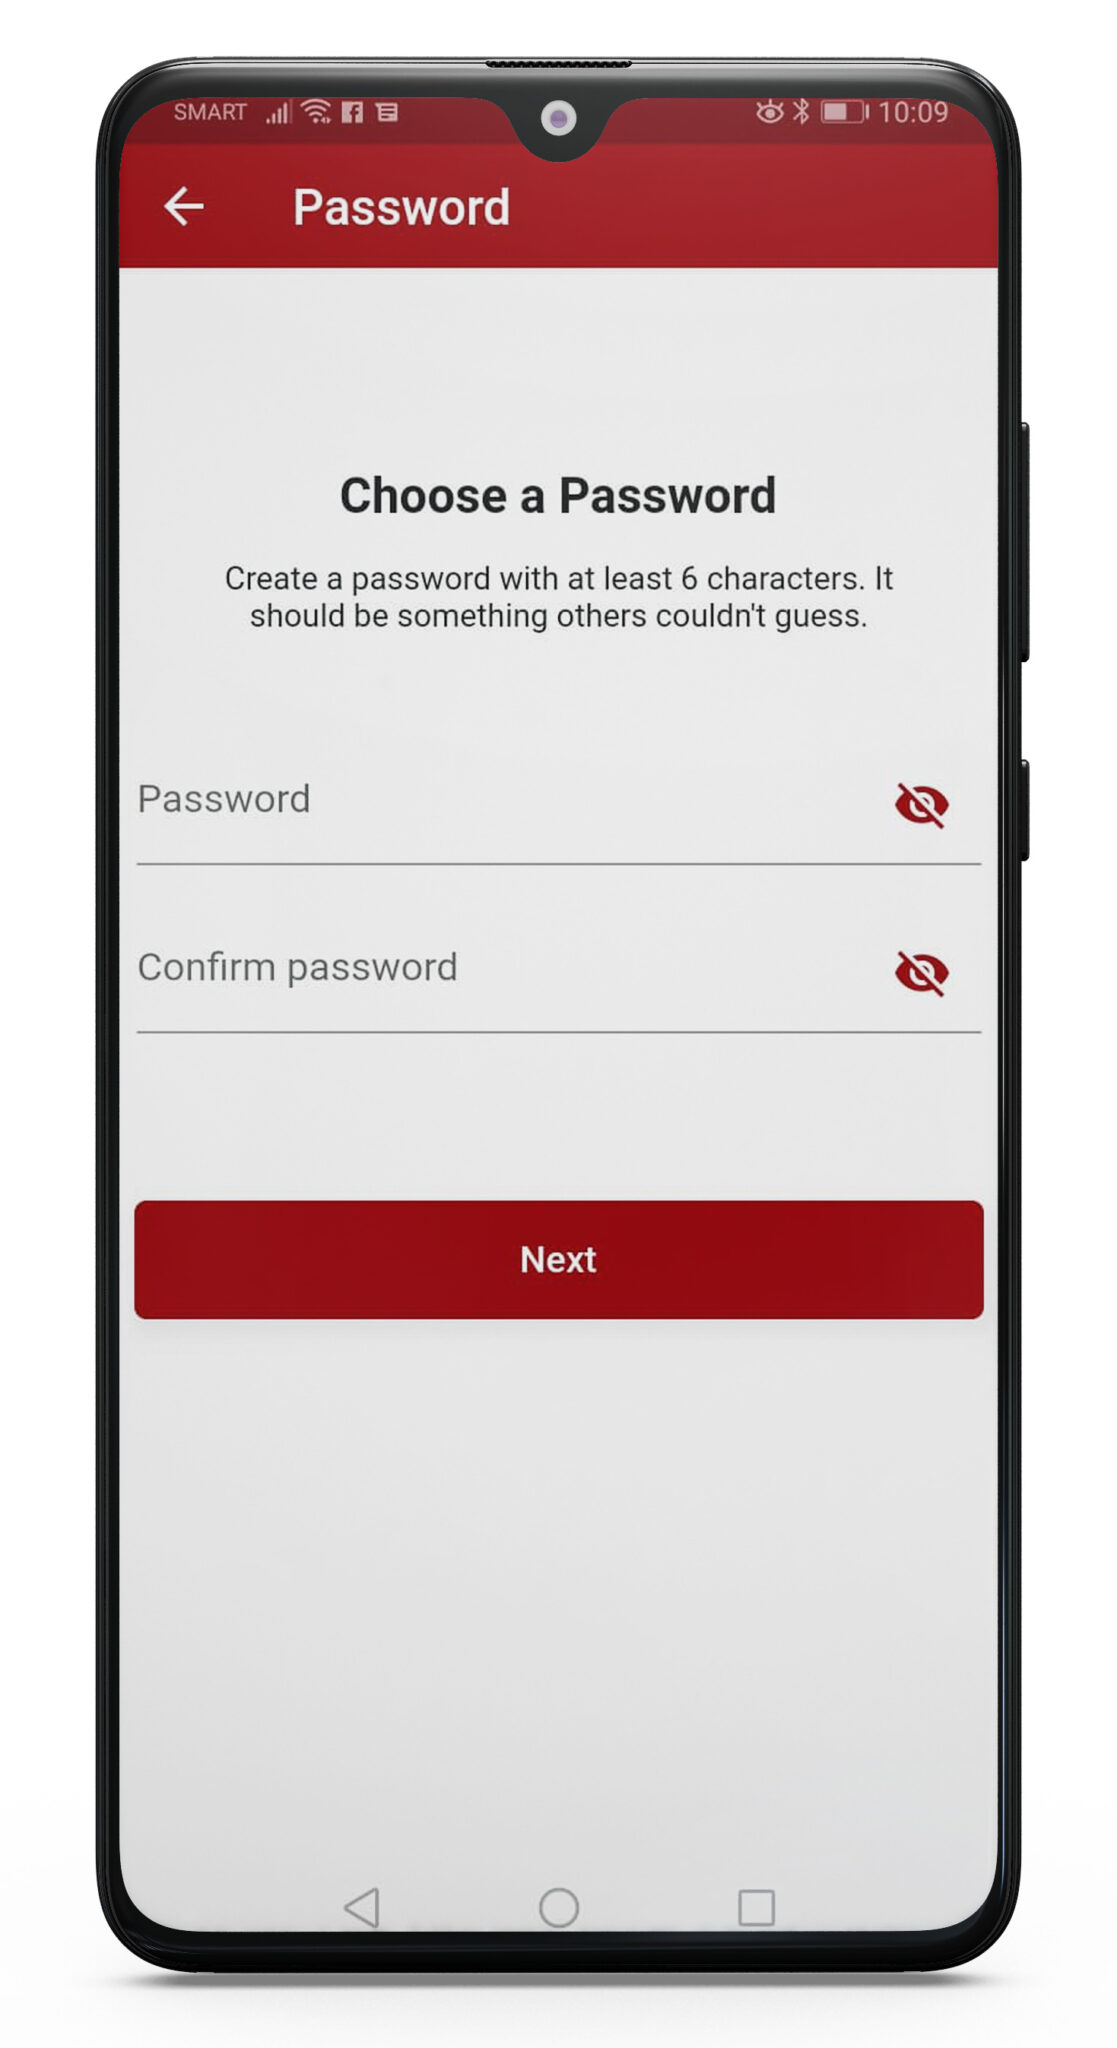
10. Finally, Choose a Password with at least 6 characters and confirm that Password. Select Next
11. A pop-up will appear Congratulations! You have created your RANGGO Business Account, now you just need to confirm it.

12. Check the email account you used to sign up. Look for a ‘Confirm Your Email’ message from us. Open it and action. You have now completed the sign up process!
Updating Your Business Profile
Now let’s finish your RANGGO App business profile.
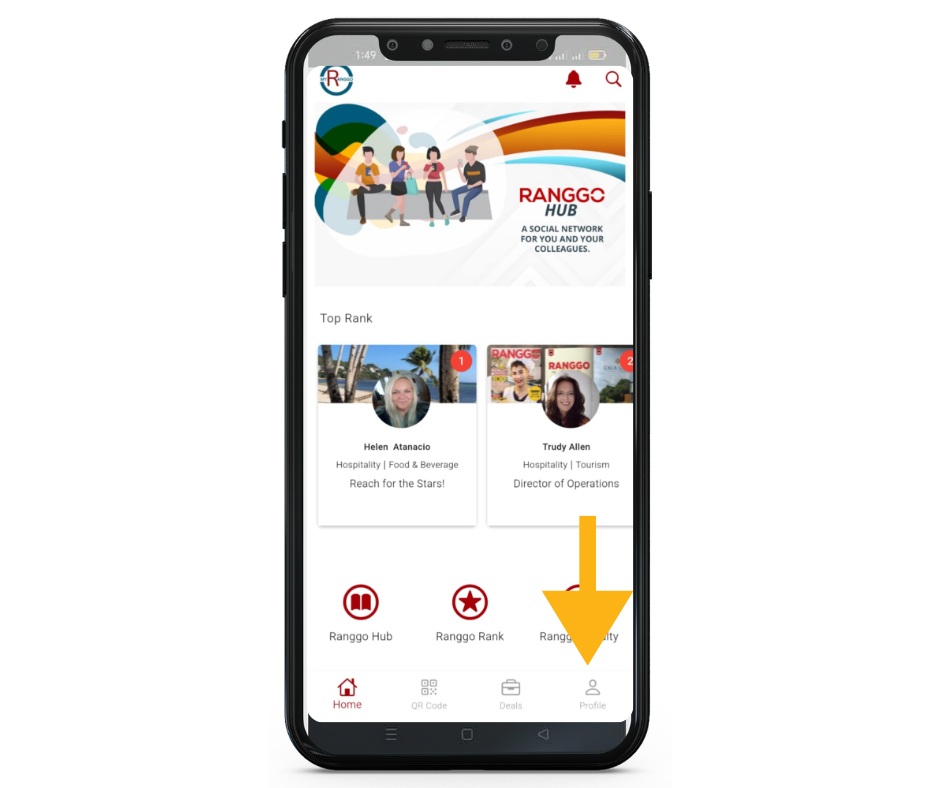
12. Click Proceed to Login and sign-in using your business email address and password. Click on the profile icon at the bottom right of the home page.
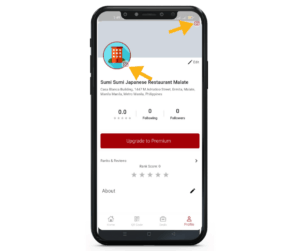
13. On your profile page you can click on the camera icons to add a Cover image. This might be a photo of your business, your staff team or food or services you offer.
And add a Profile image. We recommend adding your Business Logo.
This is the same process for creating or updating your Business Facebook Profile. You can use exactly the same photos. You can copy your Facebook Account About Section and paste it in the About Section of the RANGGO App (300 characters only).


14. Link with RANGGO! Once your Business Account is live any of your employees – who have also subscribed to an employee account, will be able to link their profile to your business – just like LinkedIn.
They can do this by completing the Experience section on their own Profile. They just need to type or select your Company Name and then select the tick box “I am currently working in this role”.
WHY? This will link them to your business as an employee. When a customer leaves a review for your Business, they can quickly find the member of staff who served them and leave a review for them too!
This can give you insight into how well your employees look after your customers. OR highlight where you need to provide individual training.
Adding Business Branches.
If you have branches of your business in other locations you can add these to your RANGGO App Business account too. You should only add them if you own or manage them.
If it is a franchise and owned by someone else, they should create their own RANGGO App Business account. You can send them your RANGGO Referral code (found in your Profile) and you will be awarded points when they create an account.
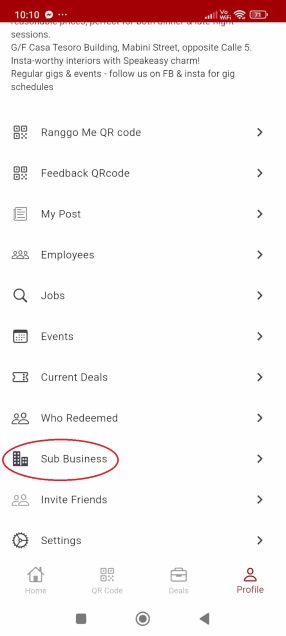
15. To Add Branches go to your Profile, found on the bottom of the screen. Scroll down and click on Sub Business.
In the next window click on the + sign at the top.

Next, enter the name of your Business and the location e.g. “Sumi Sumi Japanese Restaurant Malate”. Click Next
Then follow the same steps (steps 6-14 above) to complete the set up of your other branch.
Check out our articles and guides for using the RANGGO App features:-
- Loyalty Deal Offers
- Employee/Business RANGGO Rank (Feedback & Reviews)
- Job Listings
- Event Listings
- Network
- Social Hub
- Promo & Marketing Ads
- Training & Resources
- HR Features

